Have you Heard of Kombucha Yet…??
My first experience of kombucha was at my neighbour’s house many years ago now. She’s really into ‘natural’ health and is always up with the latest trends in superfoods and natural wellbeing. On this particular day, she had a big jar of dodgy looking brown stuff on her bench with a layer of what looked like a mouldy jellyfish growing on it. Of course, I had to ask her what it was.
She explained that it was her kombucha, a fermented tea drink that was probiotic and good for gut health. I’d never heard of the stuff and quite frankly, it looked yuck and sounded a bit hippyish to me, so I thought nothing more about it.
Apparently it Really Works
My next encounter with kombucha was because of a friend who sadly wasn’t feeling the best. She felt sick all the time and was struggling to eat properly. On a trip to the supermarket she discovered this fermented probiotic drink. She couldn’t remember the name of it but she thought it was ginger something… and she said it made her feel better almost immediately.
So, I went in search of this miracle drink. It turns out my friend had been drinking kombucha which, since seeing it at my neighbours house some years back, has become trendy. Very trendy. My neighbour is clearly ahead of her time!!
And yes….a Kombuchery is a Thing!!
There are a growing number of artisan brands brewing their own unique kombucha flavours and what was once a hippy health drink confined to small organic stores and ‘wholefood’ cafes is now a fashionable brew available everywhere. There is even a Kombuchery that’s been established just north of Auckland complete with a kombucha refillery and taproom!!
I made some deliveries to my friend’s letterbox of various different brands and flavours that I found (she named me her tea fairy….:)) and not wanting to miss out, I thought it must be worth a try. I have sampled a few flavours and some homemade versions, and I definitely enjoy the tanginess of this drink. It’s far more interesting than water but not sweet like so many juices and store bought drinks. Perhaps for this reason, it’s also grown in popularity as an adult soft drink – a great alternative to beer or wine. Because lemonade just doesn’t really cut it anymore.
So, having tried it AT LAST, I think I could definitely develop a Kombucha habit.
A Drink of Kombucha can be Really Good for Us!!
And the added bonus is that it’s also supposed to be very beneficial for your health. There is no scientific evidence to support this but many people report experiencing health benefits after drinking kombucha on a regular basis – my friend included. Reported benefits include aiding digestion, boosting immunity, easing the symptoms of bloat, improving skin tone and general wellness.
But if you love the stuff and drink it regularly…. it could get quite pricey. So, as I had access to a knowledgeable ‘ahead of her time’ neighbour who already knows how to make kombucha and would no doubt donate a good SCOBY, I thought I’d try brewing my own.
You will Need a SCOBY
Tea and sugar are what you start with before adding in the ‘SCOBY’ and some starter, which is just already brewed kombucha. The clever part of this of course, is the SCOBY which stands for Symbiotic Culture of Bacteria and Yeast. As soon as you introduce the SCOBY to your kombucha base mixture, the yeast starts to ferment the sugar. This means that in your finished product, there really is very little sugar. After brewing, there are some pretty complex flavours to be enjoyed and the resulting drink is far more than the sum of its parts.
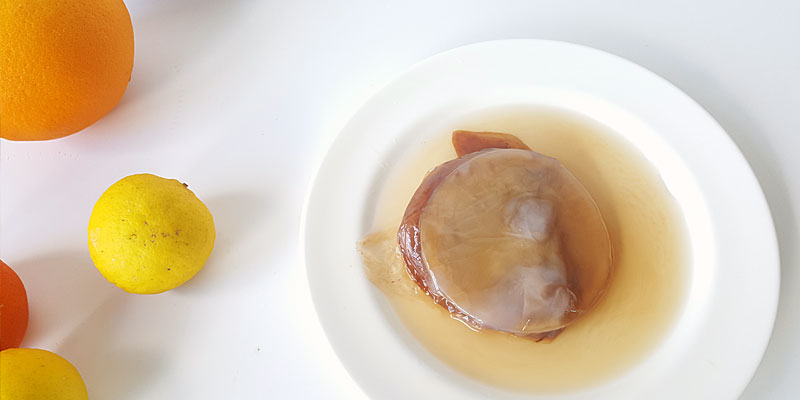
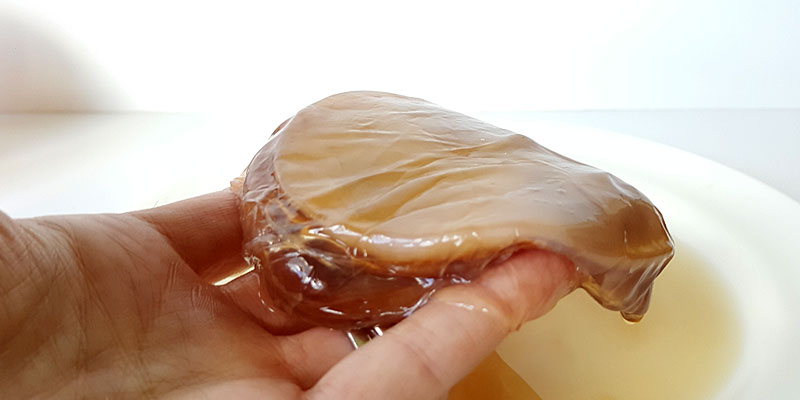
I have seen many pictures of SCOBYs and no two look the same. One thing they do have in common is that they all look weird and kind of unpleasant. Some are thick and a darker yellow/brown colour. Some look reddish and lumpy and mine….well it looks like a thin jellyfish…. It’s a whitish brown colour and it’s slimy. But that’s OK….!!
My SCOBY came complete with instructions on how to make kombucha from my neighbour. I’d researched it already though and it seems the way to brew Kombucha is pretty standard and most recipes follow the same principles.
How to Make Kombucha
Ingredients
1 SCOBY
125ml starter liquid (Kombucha)
3 litres Water
4 Tea Bags (black, green or white tea but not herbal tea) or the equivalent of loose leaf (organic is recommended because regular tea bags have high levels of fluoride apparently)*
250g Raw Sugar (or castor if you prefer)
*Black tea is what I used and it produces a darker drink. If it’s your first time, I suggest you start with this. Once you’ve mastered a few good batches, it’s worth trying green or white tea. My neighbour made up a really nice batch which was pale pink in colour and for this she used green tea. Oolong can also be used so feel free to experiment and see what you like.
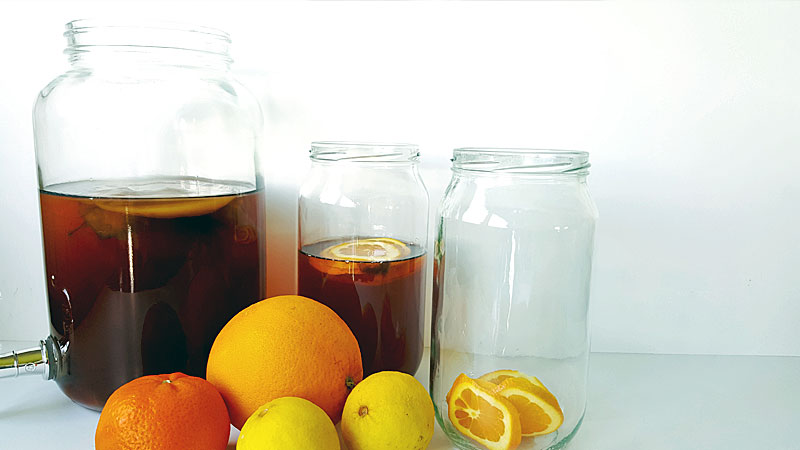
You will also need a large jar of 4L capacity and a cloth and band to cover the opening.
Method
1. Put the water and sugar in a large saucepan and bring to the boil, stirring to dissolve the sugar.
2. When the water has boiled, take the pan off the heat; add the tea and leave to steep for 10 minutes.
3. After 10 minutes, remove the tea and leave the liquid to come to room temperature. Don’t leave it overnight though as mould may form.
4. Pour the liquid into your large jar, add the starter and with clean hands lay your SCOBY on the surface of your liquid. There is usually an obvious top and bottom of your SCOBY so try to keep it flat and the same way up as it was in the jar it came in!! I was a bit nervous about touching my SCOBY so for the first time I just poured my starter and SCOBY right in there. The poor SCOBY got a bit misshapen and ‘folded’ but the brew worked out fine. So, don’t worry if this happens to you. Your SCOBY will grow to fit the new vessel.
5. Put a cloth over the top and secure with a band. Leave the big jar in a dark place with a warmish constant temperature. A hot water cupboard is ideal. We don’t have one of these so mine went in the laundry which is dark but not especially warm. All was well.
6. Leave your brew for 7 days and have a taste. I got myself a jar with a little tap on the bottom which was ideal for ‘tasting’. If the brew tastes sweet or like tea, it needs a bit longer. The longer you leave it, the more ‘tart’ or vinegary it will become. I left mine for 11 days but my recipe says it can be left for 21 days so I guess it’s a bit of trial and error to see how you like it.
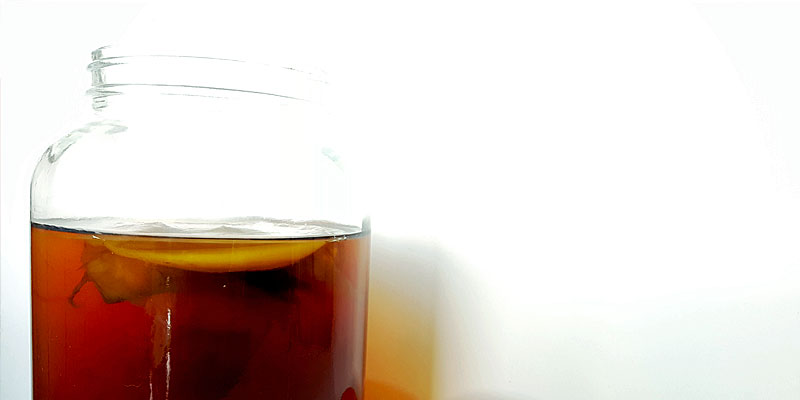
7. When it’s ready, you just need to decant it into clean bottles or jars. I used old olive jars which are 1L capacity which I thought would be better than bottles because you can be sure they are properly clean.
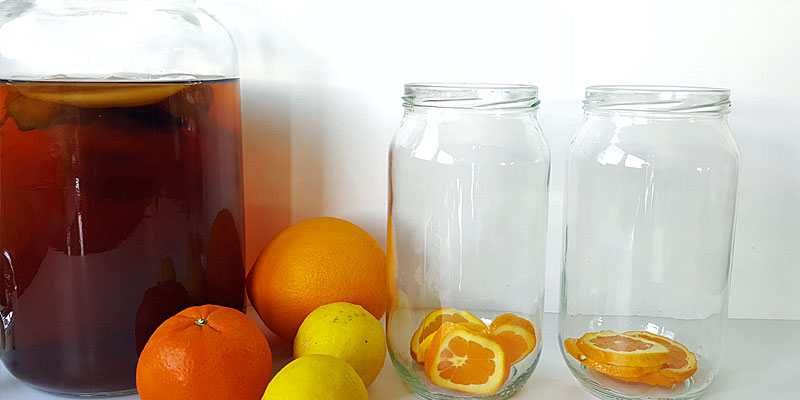
8. At this stage you can add flavours to your brew. I added 3 lemon slices and 3 slices of fresh ginger into each jar but I think the options are limited only by your imagination. For my second batch, I added about a tablespoon of unsweetened blackcurrant juice to each litre of Kombucha and that was yum too…!!
9. You can drink your kombucha straight away or leave on the bench for another 1-3 days to help it fizz up. If you want fizz, fill your jars or bottles as high as possible so there isn’t much air. I did this as I wanted some fizz!!! Be aware though… you won’t get a really fizzy result like lemonade. It’s more what I would call, lightly carbonated.
10. When its ‘ready’ keep it in the fridge and enjoy!!
If you want to keep a fresh brew always on the go – do what I do. Before I start bottling I make a new tea so it is steeped, cooled and ready to go. As soon as my brew is bottled I simply lift out the SCOBY and starter, pour in the cooled tea, add the SCOBY and starter back in and voila. A new brew is on the go.
I’ve been enjoying a glass of Kombucha every day since I started brewing. It’s a really refreshing drink and I love knowing that it might be good for my health as well as offering some basic hydration!!!
Have you tried Kombucha yet… or thought about brewing your own…?? If so, I’d love to hear what flavours you enjoy and any tips you have to share about achieving the prefect brew X
Please Note: When brewing kombucha at home it is important to maintain a germ-free environment to avoid your brew becoming contaminated with unwanted fungus or bacteria. We recommend consulting your health professional before taking kombucha if you are pregnant or breast-feeding, have a weakened immune system or have any doubts whether kombucha is suitable for you.
Want to see some more mouth watering homemade recipes?